Did you know that by the end of 2021, E-commerce sales are predicted to account for 18.1% of retail sales worldwide with over 2.14 Billion global digital buyers?
Ever wondered why more and more people prefer virtual shopping today than ever before?
No, it’s not just the ease & convenience of shopping from the comforts of home but many more tricks that attract customers such as their unique themes, layouts, search algorithms, apparent discounts, free delivery, easy product comparisons, etc.
So now are you also tempted to explore the vast sea of possibilities of online business and make some extra profits? Do not worry, as there are many online services available to help you.
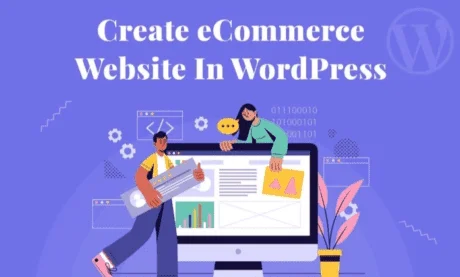
In this review, we will guide you step by step on your journey of creating your E-commerce website/store on WordPress
Why choose WordPress?
About 25% of the digital world is currently powered by WordPress- the free and open-source content management system.
The main reason that most website owners right from the basic beginner websites to the big-wigs like TED Blog, Microsoft News, BBC America, etc. prefer WordPress is its extreme ease of use and the unique plugin-based modularity that can extend the site’s functionality to meet almost any needs.
WordPress is particularly suitable for E-commerce sites as it is enriched with numerous readymade themes, constantly updated security patches, and fully functional plugins to aid you with product display shopping cart to checkout, and payment.
It also provides flexibility and control over the look and feel of your website as well as lets you add blogs and forums to connect better to the customers and all this for free except for your hosting company’s monthly cost and charges for premium themes, add-ons, and plugins.
Therefore, WordPress is been the #1 choice among many to create any kind of website because it’s easy to use, highly customizable with a vast selection of themes and plugins, is free and open-source, has a large supportive community, and is considered very SEO-friendly.
In a Hurry? Simple steps of building your e-store with WordPress
If you want to have a glance at the procedure of building your e-store with WordPress swiftly, let’s give you a cheat sheet (Let’s warn you though, we get into every nook and corner of eCommerce via WordPress in our detailed section, if you have the patience)
Step 1 Get a domain name and a Web hosting provider
Step 2 Install WordPress on it
Step 3 Select, Install, and set up an e-commerce plugin
Step 4 Add products or services for sale
Step-5 Choose a powerful and aesthetic theme for your store
Step-6 Supercharge your store with more extensions and plugins
Let’s Probe Deeper???!!!
Let’s not leave any stone unturned to learn the basics of creating an e-shop with WordPress before you venture to the real task. So let’s get into the details:
Step 1: Get a Domain name and Web Hosting Provider
A web hosting provider is just like a library or a virtual web space that stores all your data till the user accesses it.
You may opt for shared WordPress hosting, which is comparatively cheaper but offers you very less control, slow loading, and smaller storage and bandwidth, as it is shared among many different websites.
Alternatively, if you can be a little generous on the budget, we would suggest you go for a WooCommerce hosting or dedicated server that gives a partial or whole server exclusively for you thus ensuring quick load time of your site and minimum downtimes. Meanwhile, it also gives you wider control and more storage and bandwidth for your data.
But before choosing your hosting company the very first decision you need to make is the Domain name which is more like an address to the location of your website (like ours is, Hostingcharges.in) on the internet and this is what one types into the address or search bar of the browser to reach you.
Though in WordPress you might be charged for a domain name starting from $10 per year, most hosting services we have chosen for you come with a free domain name even in their basic plans.
Though there are many hosting companies that provide all different kinds of hosting plans exclusively for WordPress, we recommend Hostinger for beginners just started their online journey and hence looking for a cheaper option.
LiquidWeb for premium managed servers, best suited for growing and high-traffic eCommerce websites.
Why Choose Hostinger? Read our In-depth Hostinger Review date(Y) – An In-Depth Analysis of Features, Performance, and Value
Why Choose LiquidWeb? Read our In-deth LiquidWeb Review date(Y)
For example, if you choose Hostinger, you can choose their basic premium plan that costs you just $2.49 per month and upgrade anytime later as your business grows.
Then all you have to do is registering a domain name of your choice with a domain extension (.com, .in, .net, etc.) Or simply transfer to Hostinger if you already own one. Finally, pay your subscription fee via credit card or other options.
Step 2: Install WordPress
The next step is to Install WordPress on your chosen hosting either using the one-click option or manually
One-click installation
Using this option, your hosting provider does the installation for you, and that too without any charges. The only thing you need to ensure is that your provider is trustable and supports PHP 7, MySQL v5.6+ or MariaDB v10.0+, and HTTPS as recommended by WordPress.
The one that tops our list of reliable web hosting companies with a 1-click installation feature for WordPress is HostSoch, the Indian company guaranteeing 99.9% Uptime, a free domain name for a lifetime, and a 1-click installation with cPanel platform all at a cost as cheap as Rs.99/month.
If you don’t trust our word, read reviews by trusted users here.
Manual Installation
Choose this option if you are an advanced user, to set up a server manually and install WordPress on it. Your requirements for this are an FTP client, a database set up through cPanel or phpMyAdmin, and access to your web server.
If you are stuck at any step, Get help from WordPress Help documentation
Step 3: Select, Install & set up an E-commerce plugin
Now that your blank WordPress website is live, let’s turn it into a fully functional e-commerce store by choosing an e-commerce plugin and setting it up.
We recommend WooCommerce as it is not just a WordPress Plugin but also a highly customizable platform with its own plugin system and is used by about 30% of all online stores on WordPress.
Read: WooCommerce Review – Why it’s the best WordPress eCommerce Plugin?
To install it, go to your WordPress Dashboard, click on Plugins followed by Add New and search for WooCommerce.
Next just Install and Activate it following the instructions of the set-up wizard and you are good to go.
WooCommerce at this stage also walks you through the basic set up process for your store’s locale, taxes, and payment opinions. This is also the time when you set up various store pages for Shop, Cart, Check out, My Account for customers, etc.
According to our research, HostSoch is an ideal web hosting to be paired with most eCommerce plugins such as WooCommerce, Magento, and PrestaShop as it also comes with a free SSL Certificate to keep your website secure.
Step 4: Add products or services for sale
This is where you get to the serious business of building your catalog by adding products or services that you intend to sell.
This can be done by clicking on ‘Products’ and then ‘Add Products’ on the Dashboard. You will be directed to a page that reminds you of the classic WordPress blogging page with the difference that here you will be writing Product name in place of Title, and Product description in the contents box.
Make sure to choose a product name that gives you the most reach (take the help of SEO tools if needed) and the product description must be unique and creative to catch the eyes of the customer.
While you are at this step you can also add product categories, tags, and images that will direct the customers to the item.
Step 5: Choose a powerful and aesthetic theme for your store
The look and feel of your website are determined by its Theme which also makes it stand out from the crowd of other online stores. Go to the ‘Themes’ option in the ‘Appearance’ section on your Dashboard and click on’Add New’ You can just Install a free Theme from here or upload a paid theme as a zip file.
You also have the option of getting themes from 3rd-party apps like iThemes, Themify, and Themeforest or even just sticking with the StoreFront theme that comes with WooCommerce.
Step 6: Supercharge your store with more extensions and plugins
With WordPress, there are no limits to your site’s potential. You can install as many plugins, add-ons, and extensions to make your site powerful and give your customers the best shopping experience.
Some of the much-needed extensions for an e-commerce store are Payment Gateways, Shipping Extensions, TaxJar (for sales tax), Accounting Extensions, WooCommerce Bookings, etc.
To expand your site’s capacities much more with respect to security, performance, and marketing etc, Consider the most popular plugin JetPack or other plugins which are mentioned in our below pages:
- Best Rated WordPress Caching Plugins to speed to up your Site
- High recommended WordPress Security Plugins to secure your WordPress websites
- Must consider WordPress Backup & Restore Plugins
Let’s Sum it all!!!
Congratulations!!! Now you are a proud owner of a fully working e-commerce store with no loose ends. We hope that we have guided you through each step in depth and made you capable of improving and expanding your site independently. Keep browsing through our blogs to find solutions to all your website and hosting-related queries.